From the iPad App Store, search Microsoft Remote Desktop and install the app on iPad
Once Microsoft Remote Desktop installed, click on the RD Client to launch App
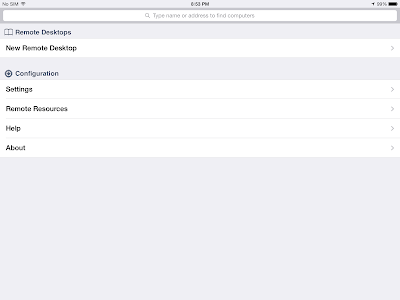
Once RD Client launched, you will see a landscape view of the App
To start a New Remote Desktop connection, click on New Remote Desktop on the menu on the left
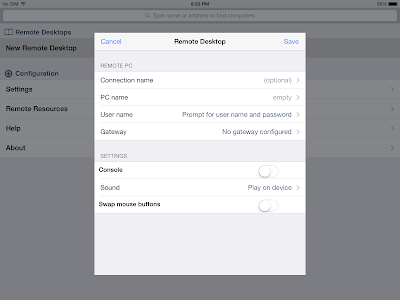
You will need to key in the Remote Desktop details on the New Remote Desktop setup
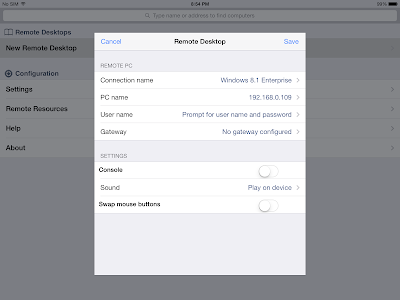
Key in the Connection name
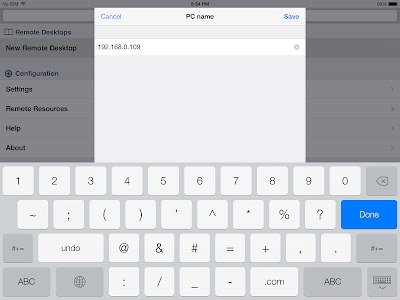
Next, key in the IP address of the target Remote Desktop server or client
Once done, click on Save and you should be able to start a Remote Desktop session now even or you may choose to key in and save the user name and password for login.
Connect to the Remote Desktop Connection created earlier and the App prompt for user name and password
Key in the user name and password to logon
Below is a screen of Remote Desktop trying to reached to the Remote Desktop Connection
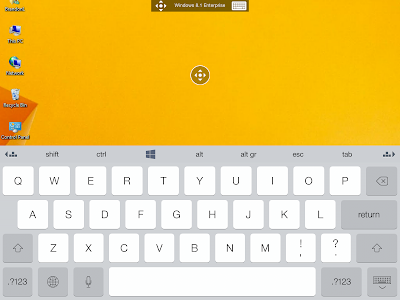
Once Remote Desktop session successfully established, you will be able to see the Desktop or the remote client. In this case, I am accessing a Windows 8.1 Enterprise client
You are able to tap and touch from iPad on Windows 8.1 via the Remote Desktop for eg. to bring up the Start menu
You will also be able to type in command prompt as if typing on desktop
To bring up the top menu simply tap on the top menu bar, from here you will be able to disconnect the Remote Desktop and to bring up the soft keyboard
The soft keyboard is designed for Windows use where you can find the Windows key on the top row and some common use keys
The Keyboard can be resized as well
Try to tap on the Windows logo key now
Tada, the Windows 8.1 Tiles appearr now!
You will be able to use the Tiles and navigate around, the experience is seamless from using the Windows on a physical computer. I am sure this tool absolutely benefit most of us who use Remote Desktop for daily work. Try out one today :)







No comments:
Post a Comment